Move From Empty Glass to a Stable Iwagumi Without Disturbing the Stones
An Iwagumi setup succeeds when the stone arrangement survives every practical stage that follows it. Heavy rock must remain stable while soil is packed around its base. A careful slope must hold while hundreds of small plant plugs are inserted. Those plugs must stay rooted during filling, cycling, and the first water changes. This step-by-step process treats the layout as both a composition and a working aquarium. It begins with preparation and structural support, then covers stone transfer, planting, controlled filling, equipment startup, cycling, and the first maintenance. By separating these stages, you can diagnose problems without repeatedly dismantling the landscape and give the minimalist design a stable foundation for long-term growth.
A: Seat major stones on stable support first, then pack and shape planting soil around their bases.
A: Use only enough shallow water to reveal erosion and floating plugs while corrections remain easy.
A: Unsupported elevation, direct pouring, weak retaining structure, or fast current can move loose substrate.
A: Adhesive can support a sound joint, but the formation still needs reliable mechanical stability.
A: Start it after the tank is filled and loose plants are reset, then adjust the return carefully.
A: Roots may be too shallow, bases may be damaged, substrate may be disturbed, or flow may strike the area.
A: Base frequency on substrate guidance, water tests, organic load, and observed conditions rather than one universal schedule.
A: Trim after the carpet is rooted, spreading, and able to recover from lost leaf mass.
A: Use a humane fishless approach suited to the system and add livestock only after cycling is verified.
A: Stable stonework, rooted plants, reliable filtration, safe water, and repeatable maintenance indicate establishment.
Stage 1: Prepare the Aquarium and Record the Empty Dimensions
Set the aquarium on a level, load-rated stand and confirm the final location allows filter and water-change access. Clean the inside with water and a dedicated cloth, never soap. Measure the interior footprint and the usable height below the rim. Note the normal viewing distance and camera height if the tank will be photographed regularly.
Protect the work surface and arrange materials by weight. Heavy stone stays near the tank so it is not carried over glass unnecessarily. Keep substrate, inert slope fill, retaining mesh, plant trays, water conditioner, and towels within reach. A calm setup area reduces the temptation to balance a rock temporarily in an unsafe position.
Stage 2: Confirm Every Stone Is Clean and Suitable
Brush stones under water to remove loose dirt. Inspect cracks, sharp projections, and unstable bases. Confirm that the stone’s effect on hardness and alkalinity fits the planned plants and livestock. Lay the selected formation out beside the tank in placement order and photograph it, including the amount intended to be buried. Weigh only what is necessary for handling decisions; a precise number does not replace structural judgment. If a stone is too heavy to lower safely with clear control, get appropriate help or select a manageable alternative. Protect fingers from pinch points and never rest a major piece against the glass while reaching for substrate.
Stage 3: Build the Hidden Elevation
Follow the aquarium manufacturer’s bottom-protection guidance. Place aquarium-safe inert fill inside mesh bags where the rear or primary formation needs height. Keep the fill stable and away from the front glass. Add retaining pieces to stop soil from sliding into the planned open valley. The internal structure should carry elevation; loose aquasoil should refine it rather than bear the entire slope.
Test the empty foundation with gentle hand pressure. It should not rock, collapse, or push a hard edge against the pane. Leave room for a planted substrate layer above the support. A foundation that consumes all soil depth may hold stone but give roots nowhere to establish.
Mark the future low point of the valley and the highest rear line. These references prevent gradual overfilling from flattening the planned silhouette. Check them from the front, because an impressive slope from above can be invisible at eye level.
Stage 4: Seat the Primary Stone
Lower the primary stone onto its stable support before pouring the full soil layer. Use two hands and keep it clear of the glass. Rotate it to match the documented face and lean. Confirm that the base is secure, then add substrate around the lower mass so the rock appears embedded.
Check the visible height against the expected carpet. If the key face will vanish after several centimeters of growth, raise exposure now without compromising stability. Leave cleaning clearance from the pane and enough soil around the base for plugs, but do not rely on soft granules to stop movement.
Stage 5: Install Supporting Stones in Rank Order
Add the strongest support stone, then the next, following the reference photograph. Align their grain with the formation while varying burial and exposure. Overlap some edges from the front view. Press soil firmly around bases and test each piece before adding small fragments.
Stage 6: Shape the Visible Terrain
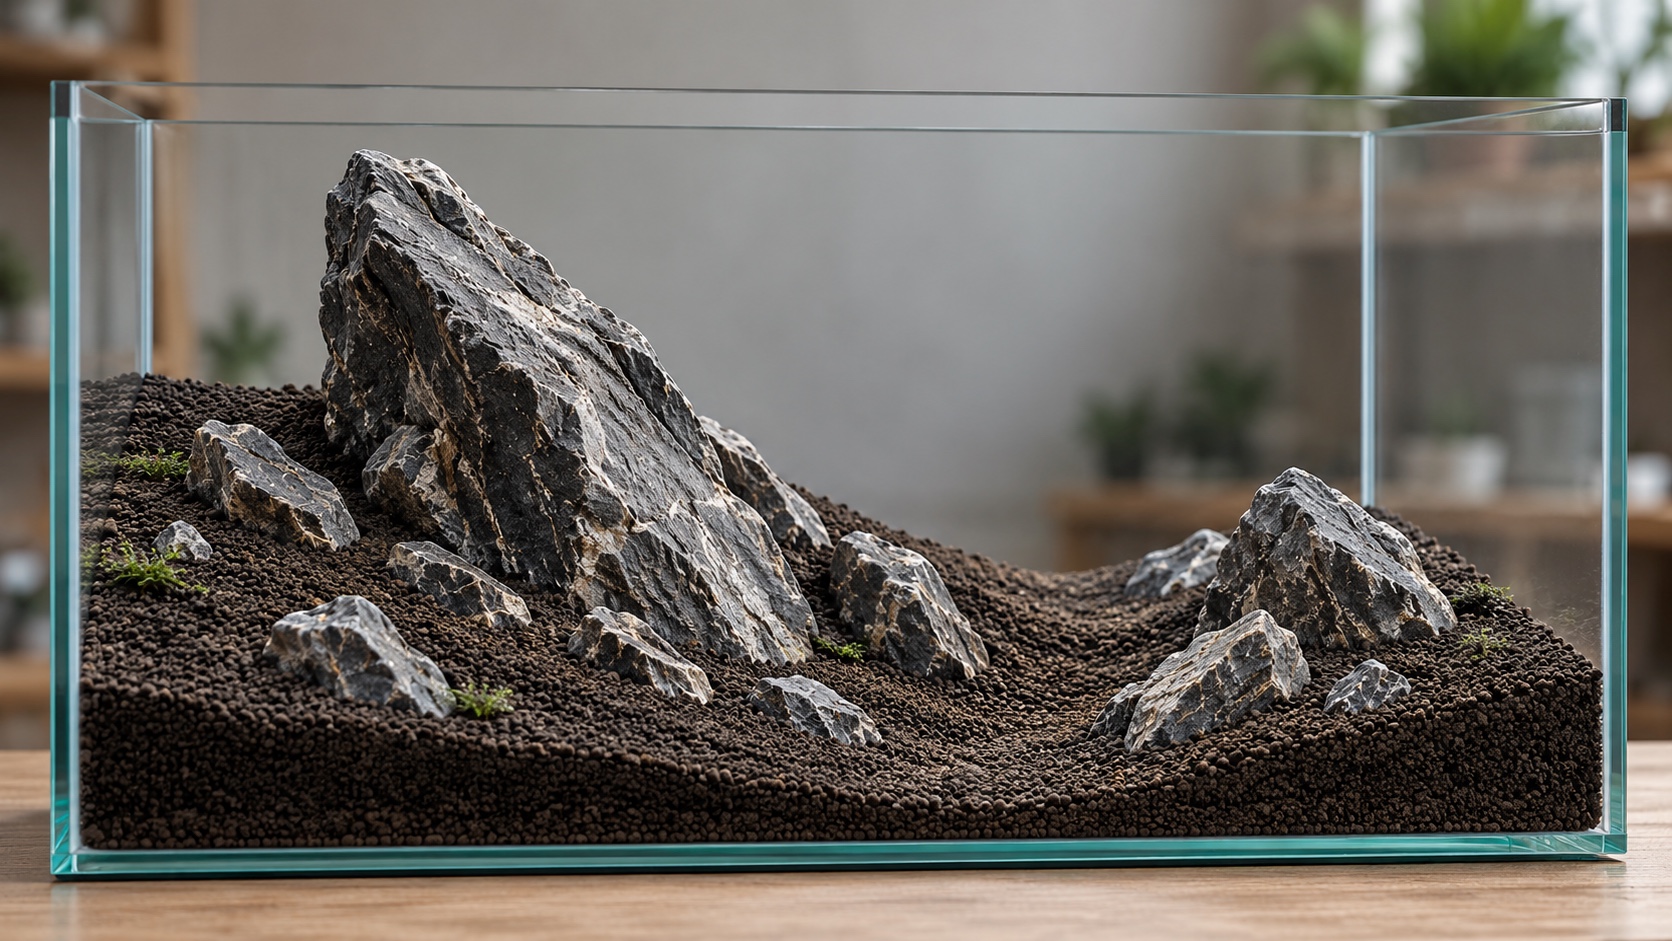
Pour the remaining substrate in controlled amounts. Maintain a lower front and supported higher rear, with shallow rises around stone groups. Use a brush or card to shape the valley. Avoid a perfectly smooth ramp; small irregularities create more natural light and plant texture.
Add small fragments sparingly at transitions. They should appear to have broken from the same formation, not outline every edge. View the tank from the normal position, then remove grains from stone faces. Photograph the completed dry hardscape as the maintenance reference.
Perform a final stability test. Press gently on the accessible sides of each major rock. Confirm that no stone can roll toward the glass if soil settles. Fix movement now. Plant roots and water weight will make later correction much more disruptive.
Stage 7: Divide and Position the Foreground Plants
Prepare the chosen carpet according to its form. Split tissue culture or potted material into small healthy portions, removing gel or rock wool as appropriate. Keep portions moist. Discard damaged tissue that would decay below the new growth.
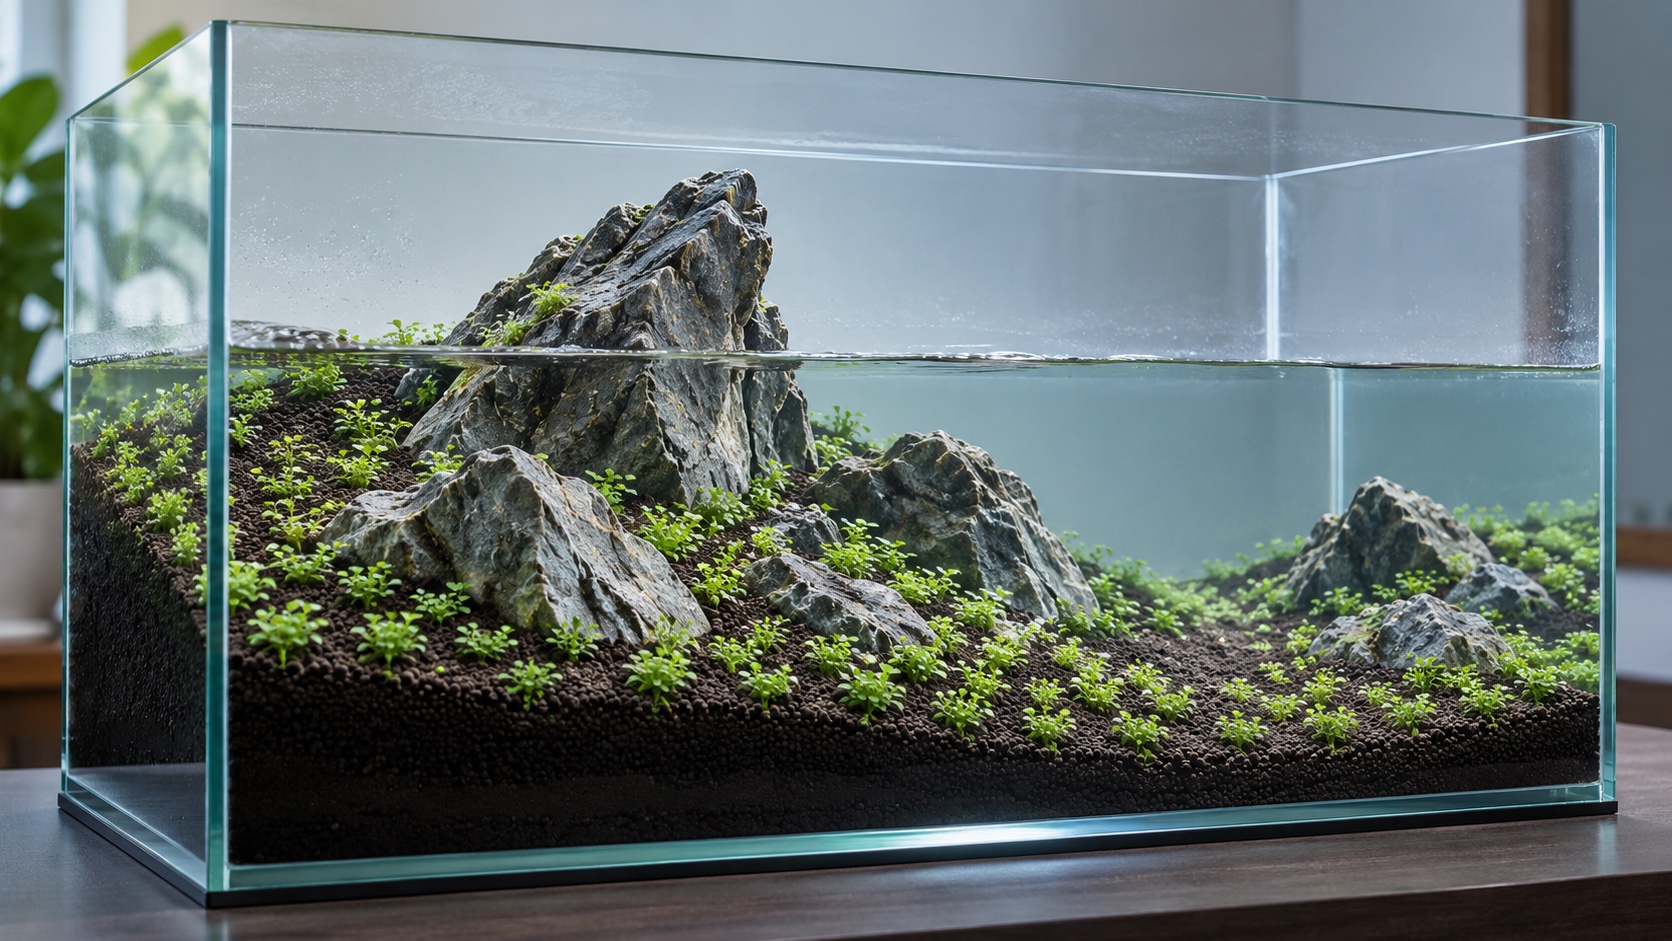
Plant with tweezers into damp substrate, starting around stable stone bases and working toward open areas. Insert roots deeply enough to hold, then adjust the crown to its proper level. Use irregular spacing: closer in sheltered pockets, wider along erosion lines and selected bare areas. Avoid levering tweezers against stone.
Stage 8: Complete a Controlled Partial Fill
Lay a plastic sheet, plate, or shallow bowl over the lowest substrate and add conditioned water slowly. Stop when water covers the foreground by only a small depth. Replace floating plugs, repair any soil channel, and inspect the slope from both front and side. Shallow water makes correction much easier than a full tank. Observe which particles move when the barrier is lifted slightly. Fine grains drifting from one bank identify a weak retaining edge before full hydrostatic pressure and flow complicate the problem. Lower the water if a substantial repair is required. Packing fresh soil into moving water rarely creates a durable correction.
Stage 9: Fill Fully and Start Circulation
Continue the slow fill without pouring directly onto rock bases. Start the filter and heater, then inspect every connection. Aim the return for broad circulation across the foreground and through the open valley. A strong narrow jet can lift plugs and carve soil; weak circulation can leave debris behind the formation.
Set the light to a conservative duration and intensity. If pressurized carbon dioxide is used, establish safe, stable timing and distribution before increasing light. Record the initial settings and water parameters. This baseline is essential when carpet behavior changes during the first weeks.
Remove floating leaves and loose soil particles. Temporary cloudiness may clear through filtration, but continued soil movement points to an unstable fill pattern or excessive flow. Correct the cause rather than adding a cosmetic clarifier.
Stage 10: Manage the First Water Changes
Active substrates can release ammonia or dissolved material during startup. Follow the product’s relevant guidance, test the water, and change water according to actual conditions. Pour replacement water over a barrier every time until roots and terrain are secure. Inspect the valley after draining because falling water levels can pull loose plants.
Match replacement-water temperature and chemistry closely, particularly if the tank uses a controlled mixture of source and purified water. Sudden shifts can slow plants and complicate interpretation of the cycle. Record the volume changed and the test results that prompted it so the startup routine becomes evidence-based.
Stage 11: Establish Biological Filtration
Use an appropriate waste source and test ammonia and nitrite until the system processes them reliably. Keep filtration continuous and preserve developing media. Do not add fish because the water has become clear or because a fixed number of days has passed. Cycling evidence and species requirements determine readiness. Remove melting plant tissue while leaving healthy crowns and roots. Some nursery-grown leaves may be replaced by submerged growth. Watch new shoots, attachment, and spread. Avoid uprooting every plug to inspect it; a gentle tug on selected areas and visible new growth provide better evidence.
Stage 12: Correct Early Carpet Problems
Replant loose plugs with slightly deeper root placement and reduce direct flow over the affected zone. If growth leans consistently, inspect light distribution and circulation. Pale or stalled new growth requires a methodical review of nutrients, carbon dioxide if used, temperature, and light. Change one major variable at a time.
Remove algae manually where practical and keep stone faces exposed. Do not increase every input when only one corner is struggling. Local shade, poor flow behind a rock, or substrate disturbance may explain the pattern better than a whole-tank deficiency.
Protect deliberate bare patches. Runners will naturally test their boundaries. Pull or redirect them early while their roots are limited, and restore a clean erosion line during routine water changes.
Stage 13: Perform the First Carpet Trim
Trim only after the carpet is rooted and actively spreading. Use clean tools and remove cuttings immediately. Vary height with the terrain: lower near crucial stone faces, slightly fuller on broad slopes. Thin dense mats so the lower layer receives light and flow rather than repeatedly shaving the top.
Stage 14: Introduce Appropriate Livestock
After cycling, select fish based on adult size, schooling needs, water chemistry, temperature, swimming length, and security. Add the group gradually if necessary and quarantine when possible. Monitor feeding and waste because an open minimalist layout provides few hidden processing zones.
Observe how the fish use the valley and open water. If they remain stressed in bright exposure, address cover and conditions rather than prioritizing the photograph. The setup is successful only when the inhabitants can behave normally inside the design.
Stage 15: Protect the Formation During Routine Care
During water changes, lift debris from rock pockets with controlled flow and siphon without excavating foundations. Clean visible stone with a soft dedicated brush. Compare current rock exposure and valley width with the dry-hardscape photograph. Trim or pull plants before the primary stone and open route lose their roles.
Service equipment without resting hoses or tools on the rock formation. A canister hose tug or dropped scraper can apply more force than routine water movement. Secure hoses before opening the cabinet, place removed parts on a separate towel, and keep one hand free when reaching across the tank. Protecting the composition includes protecting it from maintenance accidents.
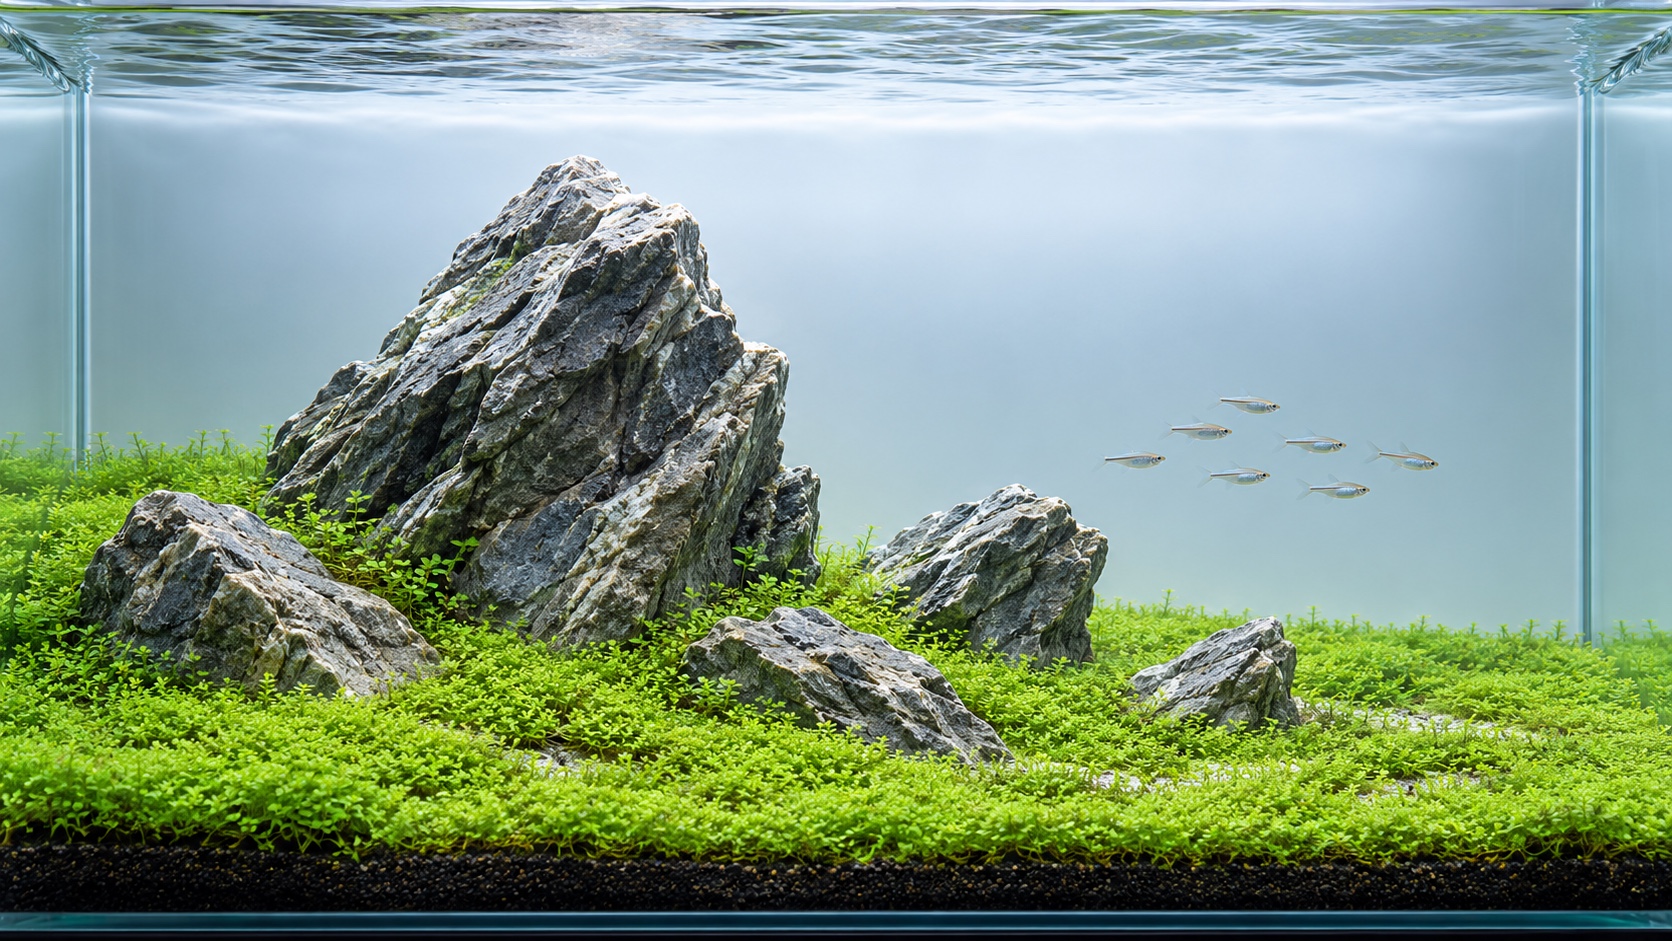
The aquarium has moved beyond setup when the slope holds, plants root, filtration is reliable, and maintenance no longer changes the stone arrangement. From then on, the work is preservation: keep the geology dominant, the carpet healthy, and the open space genuinely open.
Continue documenting the same front view after trims. The images reveal whether a support stone is slowly disappearing, the carpet is rising unevenly, or the valley is narrowing. Address one drift at a time. A stable setup should respond to light corrections without requiring the stones to be rebuilt.
Record the date and purpose of each correction beside the photograph. If the same area repeatedly fails, investigate the underlying light, flow, substrate depth, or planting choice instead of repeating a cosmetic repair. The log separates a normal growth cycle from a structural pattern that deserves a measured change.