
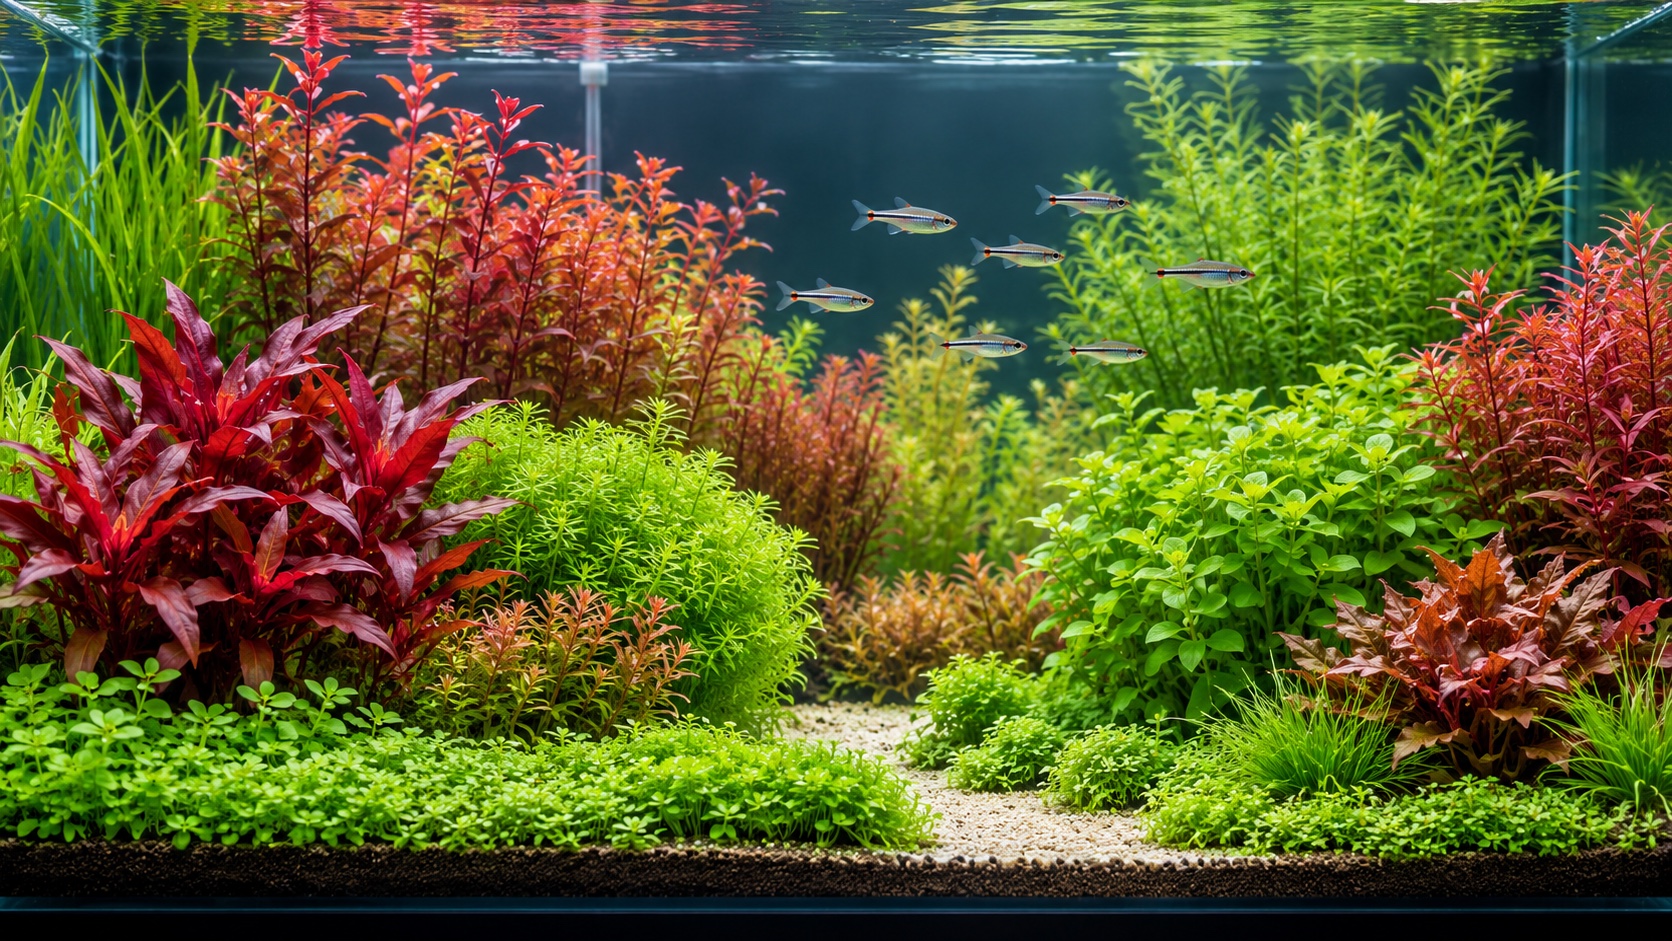
A Dutch Aquascape Is a Garden Grown Underwater
Dutch-style aquascaping replaces the single dramatic rock or root with something more demanding: plants themselves must create the structure. Distinct groups rise, recede, turn corners, and contrast with their neighbors like carefully managed beds in a formal garden. The result can look lavish, but the style is not simply “as many colorful plants as possible.” It depends on horticultural discipline, readable streets, deliberate differences in leaf form, and repeated trimming that preserves depth. Beginners can succeed by choosing a modest palette and learning how each species responds before attempting a densely packed show tank. This guide explains the visual vocabulary, equipment, planting plan, and maintenance habits that make a Dutch aquarium recognizable, while offering a lower-risk route for a first planted display.
A: No, but plants dominate the visible composition and hardscape usually plays a restrained supporting role.
A: Use a modest palette that fits the tank, often around seven to ten species, rather than chasing maximum variety.
A: It is a shaped band of one species that travels diagonally and changes width or height to create perspective.
A: Not universally, but dense high-energy planting is more predictable when carbon supply matches the chosen light and species.
A: No. Leaf shape, value, height, and texture can create a strong composition with mostly green species.
A: Crowding, shaded lower growth, repeated high trimming, and aging stems are common causes.
A: Contrast leaf form and height, maintain a boundary, or insert a restrained strip of negative space.
A: No. Trim according to growth and the planned contour, staggering major work when practical.
A: Choose species by welfare and water compatibility first; a coordinated school often supports the visual order.
A: It should demonstrate healthy distinct groups, varied contours, one useful perspective line, and a routine the keeper can sustain.
Recognize the Style Beyond Its Bright Colors
A Dutch aquascape is organized around plant groups, not around exposed hardscape. Each group has a defined footprint and a role in the overall composition. Some form low rounded bushes, others create upright walls, and selected “streets” travel diagonally toward the rear to pull the eye into depth. Adjacent groups should contrast in leaf size, shape, color, or growth direction. Two fine green stem plants may be beautiful individually yet merge into one indistinct mass when placed together.
Traditional presentation values abundant plant health, strong but controlled contrast, and limited visible equipment. A focal plant with a distinctive rosette or color may command attention, but several equally loud focal points create confusion. Open space still matters. A dark gap, short foreground, or glimpsed substrate can separate plant beds and keep the aquarium from reading as a flat botanical wall.
Start With a Manageable Horticultural System
Because plants provide almost all the visual architecture, stable growth is essential. Use a filter that circulates water throughout the planting without flattening delicate stems. Choose a light that can be timed and dimmed, and begin below maximum output. Nutrient-rich substrate supports heavy root feeders, while a complete water-column fertilizer serves stems and epiphytes. Pressurized carbon dioxide is common in high-energy Dutch tanks because it supports dense, predictable growth, but it also adds cost and demands careful, consistent operation. Plan service access as part of the system. Dense rear planting can hide an intake beautifully while making it impossible to remove for cleaning. Leave a narrow route for hands and tools, keep valves reachable, and route cords so they do not drag across stem tops. Reliability is itself a design tool because stable equipment lets groups grow long enough to be shaped deliberately.
Design the Planting Plan on a Grid
Draw the tank footprint and divide it into irregular beds rather than equal squares. Reserve larger footprints for dependable structural plants and smaller areas for accents. Place a foreground group along part of the front, not necessarily the entire width. Behind it, stagger midheight beds so their edges overlap from the viewing angle. Keep the tallest groups mostly toward the rear while allowing one controlled rise or descending street to create movement.
A plant street is a narrowing band of one species that begins wider and lower near the viewer, then becomes narrower or taller as it travels toward the back. The perspective effect works best on a diagonal. Choose a species that tolerates repeated shaping and maintains lower leaves under the planned conditions. Avoid making every group a street; one strong line is more persuasive than several competing routes.
Mark the focal area and its supporting contrasts. A red or sculptural plant becomes more prominent beside calmer green textures. Do not surround it with several other red species of similar height. The plan should alternate visual qualities: broad beside fine, round beside linear, light beside dark, horizontal beside upright. Think in masses visible from across the room, then add subtle variation inside those masses.
Choose Fewer Species Than the Finished Tank Appears to Have
A practical beginner palette might contain seven to ten species, depending on tank size. Use reliable stems such as selected Hygrophila, Bacopa, Ludwigia, or Rotala varieties where their care matches the system. Cryptocoryne can form slower midground groups, while dwarf sagittaria, Helanthium, or another suitable low plant can cover selected foreground areas. A distinctive rosette or textured plant can serve as the focal specimen.
Verify each species’ mature height, rate, light response, nutrient demand, and likely color under your conditions. Store labels are not planting plans. A compact plant under nursery conditions may become tall and invasive, while a celebrated red stem may remain greenish without sufficient light, nutrients, or carbon. Choose plants that give different visual effects at similar levels of care. The aquarium is easier to balance when its species respond to the same general regime.
Create Contrast With Form Before Chasing Red
Green plants offer broad variation: ribbon leaves, round leaves, deeply cut leaves, tiny stem foliage, and heavy rosettes. Arrange these differences so each bed has an identifiable edge. A dark broad-leaved group beside a light fine-leaved bush creates clearer contrast than two red stems planted side by side. Color becomes more powerful when it is limited and positioned to guide the eye.
Red coloration is not a simple brightness dial. Genetics set a plant’s potential, while light, nutrition, carbon dioxide, and pruning influence expression. Starving plants to force color can weaken growth and destabilize the aquarium. Healthy warm tones with strong form are more valuable than intense color on damaged stems. Judge the whole group, including density and leaf condition, rather than a single top shoot.
Use height and edge quality as additional contrast. A crisply trimmed low bush can sit before a loose, taller group. A narrow vertical species can interrupt a broad mound. Leave a thin dark separation where two similar greens would otherwise merge. These choices remain visible even when colors change with growth.
Plant Each Bed for Future Trimming
Prepare stems by removing damaged lower leaves and cutting them to workable lengths. Plant individual shoots with tweezers in staggered spacing rather than pushing an entire store bunch into one hole. The group should be dense enough to read as a mass but open enough for water and light to reach lower sections. Follow the bed outline drawn on the plan, and keep the boundary distinct from its neighbor.
Establish Growth Before Pursuing a Show-Tank Shape
During startup, prioritize roots, healthy submerged leaves, and biological stability. Run a conservative photoperiod, deliver carbon dioxide consistently if used, and fertilize according to plant mass and measured response. Perform appropriate water changes, especially with fresh active substrate, and remove deteriorating tissue. Do not trim every group into its final height during the first week; plants need enough healthy leaf area to establish.
Watch new growth rather than old nursery leaves. Pale tips, distorted shoots, pinholes, premature leaf loss, and stalled stems can each narrow the diagnosis, but avoid changing several variables simultaneously. Verify circulation, carbon dioxide stability, and dosing routine before assuming a rare deficiency. A Dutch tank magnifies inconsistency because dense groups can look lush at the surface while lower stems deteriorate unseen.
Use algae as location-specific evidence rather than as a reason to reset the aquarium. Growth on one slow bed may reflect strong exposure, while algae across many new surfaces may be part of startup instability. Remove what you can, correct the underlying imbalance cautiously, and preserve healthy plant mass. Severe cleaning can set back the competitors you need most.
Learn the Cut-and-Regrow Cycle
Stem groups gain density through repeated pruning. The first trim is often lower than beginners expect because cutting above healthy nodes encourages side shoots. As the group branches, later trims can define a rounded or sloping top. For species that decline at the base, remove old stems and replant healthy tops rather than stacking endless cut growth above bare lower sections. Do not trim the whole aquarium into a single horizontal hedge. Each group needs its own height and contour. A street may rise toward the rear, a focal bush may form a controlled dome, and a background wall may step down beside open space. Stagger heavy trims so the tank retains enough plant mass to consume nutrients and provide visual continuity. Thin from inside the group when crowding blocks flow and lower light. Removing only the tallest tips can produce a dense cap over weak stems. Lift selected shoots, discard damaged bases, and replant the best tops with fresh spacing. This is gardening, not merely haircutting; the internal condition determines how long the visible shape will hold.
Keep Plant Streets and Boundaries Legible
Fast growers cross borders through side shoots, runners, and leaning stems. Correct them early. Pull runners that enter the next bed, replant stems that fall across a street, and trim the foreground before it hides the base of a midground group. A narrow strip of visible substrate or a low transition plant can function like edging in a terrestrial garden.
Photograph the aquarium straight on after maintenance. The image flattens the view and makes merged groups obvious. If two beds have become one shape, restore separation by lowering one, thinning their shared edge, or increasing form contrast. Adding a new species is rarely the first solution; clearer editing usually improves the design more.
Use Fish as Movement, Not as Competing Decoration
A single school of suitably sized fish often complements Dutch planting because coordinated movement crosses the static beds without adding visual clutter. Research adult size, group number, behavior, temperature, and water chemistry. Dense planting does not compensate for insufficient swimming length or incompatible conditions. Keep open routes through the midwater and avoid species that uproot carefully maintained beds if the layout cannot accommodate that behavior. Feeding becomes part of nutrient management. Offer an appropriate amount and remove persistent leftovers rather than assuming heavy planting will absorb every consequence. Observe whether fish can reach food without diving into dense beds or being pushed by current. The planting plan should support normal behavior, not turn routine feeding into a disturbance.
Build a Weekly Routine You Can Sustain
Reserve a consistent maintenance window for water change, glass cleaning, plant inspection, selective trimming, and equipment checks. Rotate deeper work among plant groups instead of uprooting the entire aquarium at once. Clean filter components in stages and preserve mature biological media. Record major changes in light, dosing, carbon dioxide, and plant behavior so a later problem has context.
Prepare tools before the water level is lowered: long scissors for contours, fine scissors for precise edges, tweezers for replanting, and a net for collecting cuttings. Work from foreground to background or by planned group so fragments do not become lost in completed areas. Clean tools after use and keep them dedicated to the aquarium; an orderly bench reduces rushed cuts and accidental damage.
A beginner Dutch aquarium succeeds when growth remains predictable enough to shape. Perfect symmetry is not the target. Healthy contrasts, a readable street, clean group boundaries, and varied heights will communicate the style even with a modest species list. As your pruning skill improves, the aquarium gains complexity through denser branching and more confident transitions, not through constant shopping.